
Configuring MS Active Directory Data Export to Gathid
Gathid can be configured to process data daily from your MS Active Directory (AD) domain. This guide has been created to assist you with establishing your exports from your AD instance and uploading them to Gathid.
If your organization has more than one Active Directory domain, you must configure data export from each domain separately.
Once all AD data is uploaded, Gathid with resolve Foreign Security Principals (FSP) from each domain and create a unified view of all domain accounts, groups and computers.
Steps in this process are:
- Configure your Domain Controller
- Export data from Active Directory domain.
- Optionally, configure the export script to upload the Active Directory data to the Gathid portal.
- Optionally, schedule the export script to run and upload the data automatically.
1. Configure your Domain Controller
On your Domain Controller, in Server Roles, ensure that Active Directory Lightweight Directory Services Role is enabled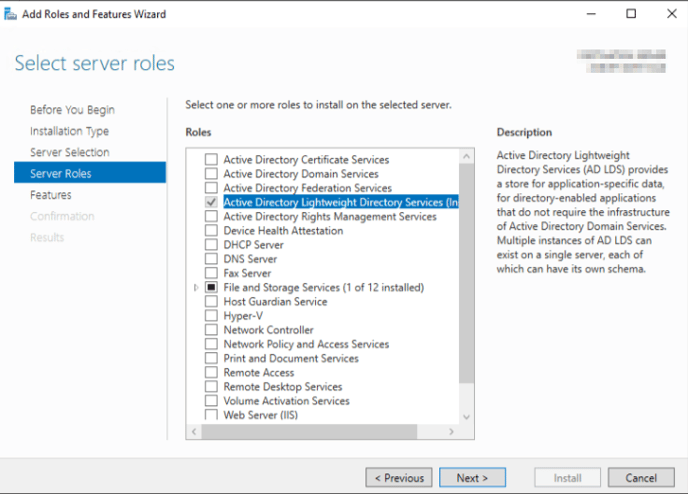
2. Export data from Active Directory domain
All scripts for the data export use the PowerShell script language. The only requirement is that the Microsoft utility "ldifde.exe" must be in the path (this tool is part of the Windows AD role).
- The package Gathid-AD-Export-Script-vXX.X.zip is located in your upload portal.
- Unzip the Gathid-AD-Export-Script-vXX.X.zip on any Windows machine in your domain. If you are not using a DC, note that Microsoft utility "ldifde.exe" must be in path.
- Examine the readme.txt file contained in the folder to see the parameters required and the usage options to run the script.
The readme.txt file also provides a list of the attributes that are being exported from your AD domain. - After a successful run, an ldif file will be created. The default filename is ADUsers.ldif.
It will be in LDIF format and contain information about user accounts, security groups, computers, and foreign security principals referenced in the domain. - Log on to your Gathid upload portal https:\\upload.access-analytics.com and upload the LDIF file here.
3. (Optional) Automating MS Active Directory files upload
Once the script is exporting correctly from your Active Directory domain (step 2) and creating a ldif file, it can be configured to automatically upload the file to the Gathid upload portal.
Obtain a "service" account from your Gathid representative. This will allow you to set the password and use it to automate the upload. The service account will not have MFA requirements and is limited to write permissions only.
Use the same Get-ADLdif.ps1 utility with two additional parameters:
-uploadUsername             User name for your Gathid Upload portal - Service Account
-uploadPassword             Password for Gathid Upload portal- Service Account
Refer to the readme.txt file folder for more detailed usage options.
(If you prefer to not invoke the script with credentials in open text, you can make use of an encrypted credentials, as detailed in the readme file.)
After successful upload, LDIF file will be automatically deleted.
Tip: If your password contains '$' symbol, it will need to be "escaped" using a preceding back-tick character, or the full password must be encapsulated in single quotes. Failure to do so will return an error message: Failed to connect Credentials invalid.
E.g.: pas`$word or 'pas$word'
4. (Optional) Schedule the script to run automatically
Once the script is exporting correctly (an ldif file is generated) and can automatically upload to the Gathid portal, you can use Windows Task Scheduler to schedule the script to run at a defined interval.
We recommend running the script daily as follows:
1. In Task Scheduler, right-click on Task Scheduler Library and create a new folder (if required).
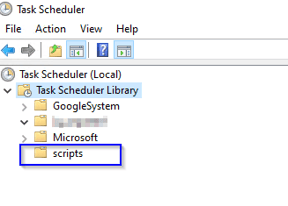
2. Right-click on the new folder and select "Create Task..." and give it a Name.
3. On the General tab:
Select a user account with enough permissions to run the script.
Select "Run whether user is logged on or not."
4. On the Triggers tab:
Click New and select Daily and set the time to run the script.
5. On the Actions tab:
Click New to configure an Action.
Program/script:PowerShell.exe
Add arguments (optional): -ExecutionPolicy Bypass -File .\Get-ADLdif.ps1
Start in (optional): the name of the folder with the script
6. Click OK to create the scheduled task
5. (Optional) Add additional Attributes
If you require Gathid to receive attributes not listed as default attributes in the AD connector readme.txt, use the parameter added to the Get-ADLdif.ps1 PowerShell script.
Parameter: -auxAttibutesList
Value: enter the Active Directory Property name
Multiple Values: separate multiple attributes by a comma ,
Example:
![]()
.\Get-ADLdif.ps1 -domainControllerName <DC_name> -domainServerPort 389 -auxAttributesList extensionAttribute1,extensionAttribute2
🖨️ Link to PDF guide: Active Directory (AD) data connector support guide
🖨️ Link to the script: AD Extraction Script