
SSO - Configuring Okta for Single Sign-On
Gathid user authentication has been designed to work with your existing identity authentication processes wherever possible.
The following guide has been developed to assist you with configuring your Gathid instance within your existing Okta identity store.
Throughout the process, you will:
- Configure an Okta Application for Gathid Single Sign-On
- Provide the required information to your Gathid representative
Register an Okta Application for Gathid Single Sign-On
- Browse to Okta Portal and log in to your organization.
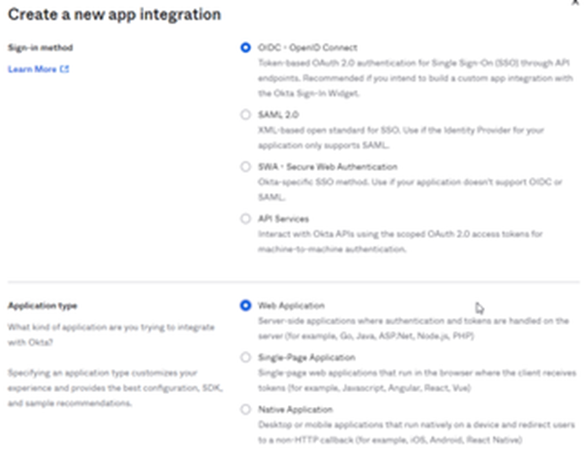
- Select Create a new app integration
- Select Sign-in method → OIDC - OpenID Connect
- Select Application type → Web Application
- In General Application Settings, configure
- App integration name, for example: e.g. “Gathid”
- Grant type → Client acting on behalf of a user → Authorization Code
- Sign-in redirect URIs → https://<CUSTOMER_DOMAIN>/realms/access-analytics/broker/okta-oidc/endpoint
- Sign-out redirect URIs → https://<CUSTOMER_DOMAIN>/realms/access-analytics/broker/okta-oidc/endpoint/logout_reponse
<CUSTOMER_DOMAIN> will be provided by your Gathid representative. Click to Register the application. You will be redirected to an overview of your new application.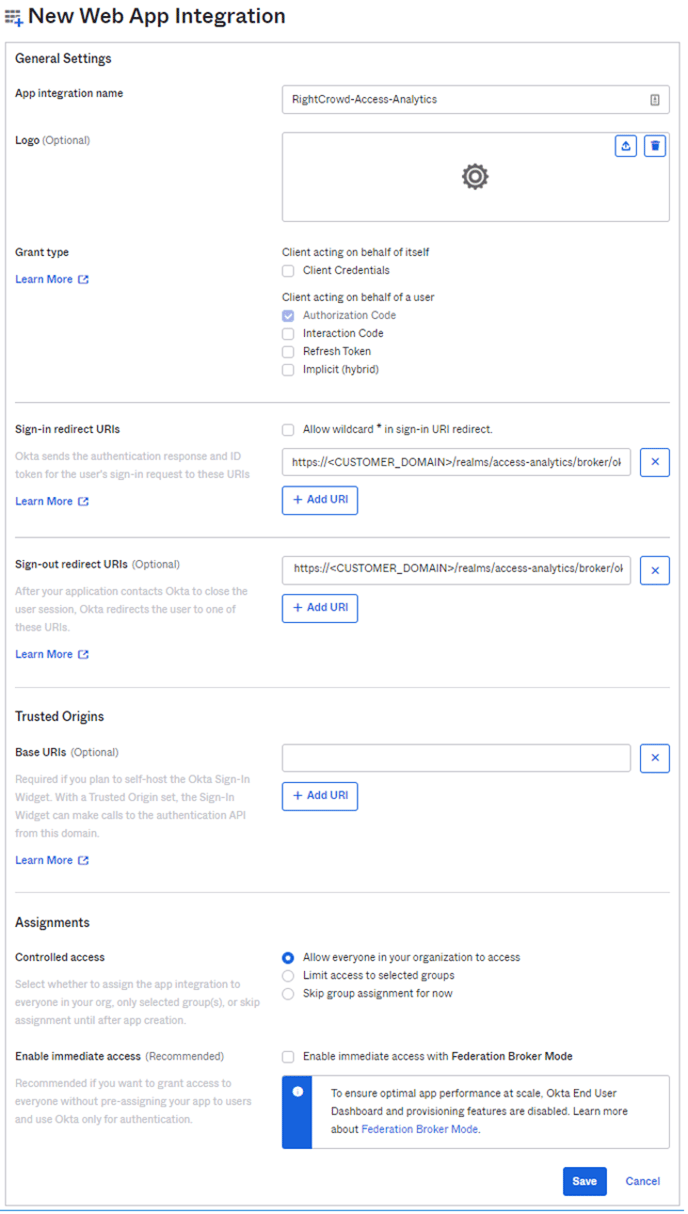
- Assignments → Controlled access → Allow everyone in your organization to access
NOTE: depending on your organizational policy, you may want to Limit access to selected groups. - Select Save
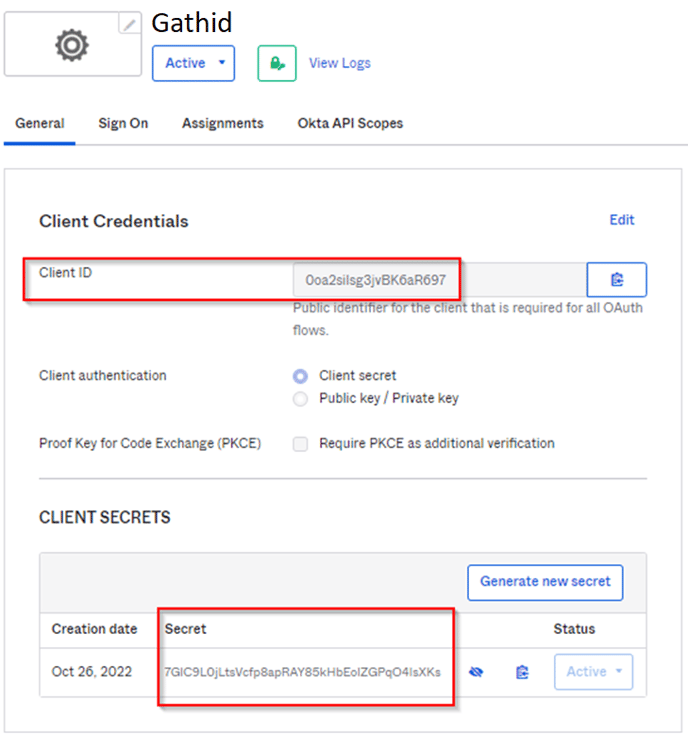
- Once the application is created, on the General tab
- Copy Client ID
- Copy Secret
- Select Sign On tab to configure Okta group inclusion in the OpenID Connect Token
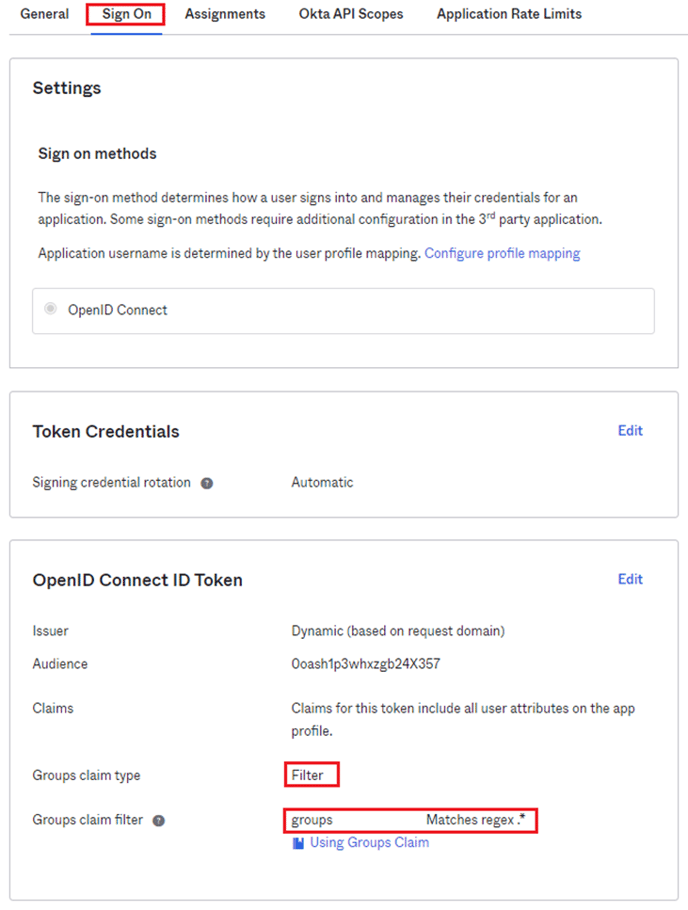
- Add Claim with the following configuration:
- Issuer-> Dynamic (based on request domain)
- Groups claim type → Filter
- Group claim filter → groups - Matches regex .*
- The proposed regex filter will send all Okta groups to Gathid. To avoid an extensive list of groups, you may update the regex filter to narrow down the list.
NOTE: For large enterprise companies to avoid exceeding the limit on the number of groups a token can emit, adjust matching regex to select only a subset of groups relevant only to access to Gathid
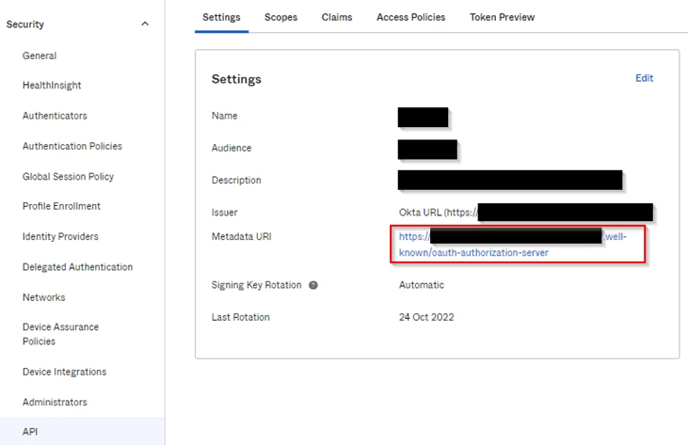
- Depending on the Okta licence your organization has, you need to provide Metadata URI or your Okta Organization URL. If you are able to see the API option on the left side menu, please proceed to the next step and get a copy of the Metadata URI. If you do not have access to the API option, please provide your Okta Organization URL, which is the URL that your employees use to log into Okta.
For more information, you can find https://developer.okta.com/docs/concepts/auth-servers/#org-authorization-server-discovery-endpoints - Select API from the left side menu, and select default Authorization server. Copy Metadata URL:
- This step is Optional.
Follow this step if you want to add Active Directory groups to Okta token claims, otherwise, progress to the next step.
Open the Claims tab from the same page and adjust the groups claim to have the Value: isEmpty(Arrays.toCsvString(Groups.startsWith("active_directory","",100))) ? Groups.startsWith("OKTA","",100) : Arrays.flatten(Groups.startsWith("OKTA","",50),Groups.startsWith("active_directory","",50))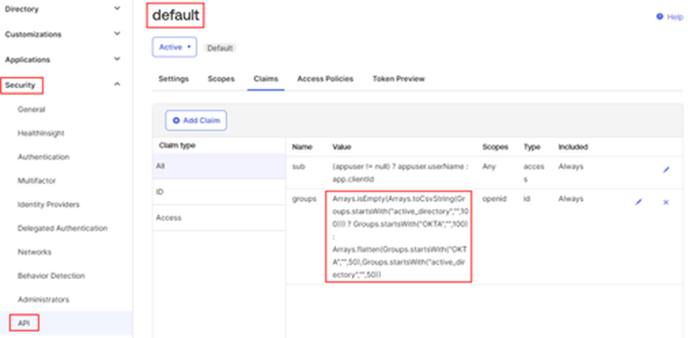
- This will ensure that any Active Directory groups synced with Okta are also displayed.
Selecting Okta Groups to be used for Gathid Roles
Once a user is authenticated to Gathid, authorization to specific functionality or data set is enforced by Role Base Access Control (RBAC). By default, Gathid has three roles defined: ADMINISTRATOR, USER, AND RESPONDER.
Initially, we recommend that you define at least one ADMINISTRATOR, other accounts can be added to the other roles that are suitable for your organization over time.
Okta Groups are used to map a Gathid role to people from your organization. You can use existing Okta groups or create specific groups for your Gathid Roles. Once you determine the group(s), please provide the group’s Object ID to your Gathid representative.
To find available group names, follow the steps below:
- Browse to your Okta Portal and log in to your organization.
- Select: Groups
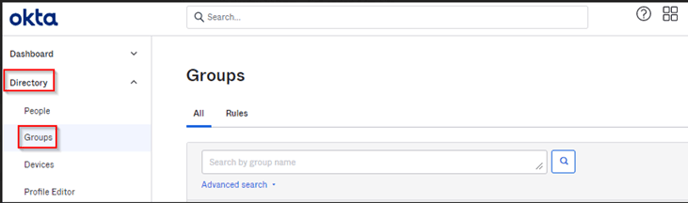
- Copy the Group Names to be used for Gathid Roles.
Creating new Gathid Groups in Okta
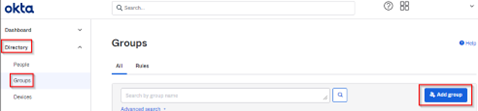
The following steps describe the group creation:
- Browse to your Okta Portal and log in to your organization.
- Select: Groups
- Select Add group
- Define your new group name and description
- Press Save to save the group.
- Copy the Name and share it with your Gathid representative.
Provide required information
Make sure you have a copy of the following and provide it to your Gathid representative:
- Client ID
- Secret
- Metadata URL or your Okta Org name - see step 17.
- Group Names for mapping to Gathid Roles
🖨️ Link to PDF guide: SSO Okta Configuration